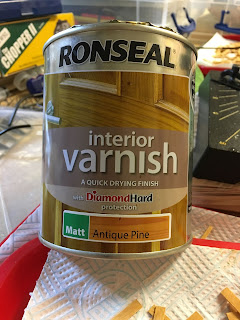
As Beaverlick Falls is a relatively new town, I wanted the wood to have a new(ish) look rather than grey and weathered. I tried various methods of colouring the balsa and basswood and have finally settled on a Ronseal matt varnish 'Antique Pine'.
I've also had some small (250ml) pots of emulsion paints mixed up to match the Foundry 'Spearshaft' triad of colours for use on MDF or 3D printed components. These thin well and can also be mixed in small amounts with the Ronseal varnish to give slight variations in shade.
Pre-colouring the wood
I've found that if unstained wood is used in construction the PVA glue seals the wood and prevents it absorbing wood stain. As a result joints and any other glued parts become much harder to colour. Pre-colouring the wood not only prevents this issue, but it saves time painting later
Production Line
As I will need a large quantity of 'planks' for fences, boardwalks, roofs and other sundry items I settled on a mass production technique:
First, I cut firelighting splints, coffee stirrers or strip balsa into lengths using a 'Chopper II' guillotine. This tool (or something similar) is a must have if you're going to produce lots of planks. It simplifies and speeds up the process no end, just set the end stop to the required length and then chop away 3 or 4 strips at a time. The razor blade will dull after a while so spares are essential.
Next, put the cut wood into a ziplock bag - the bag needs to be large enough for the wood to be shaken freely, don't cram it in - then add a 50:50 mix of varnish/water to the bag, seal it and shake for a few minutes.
MAKE SURE YOU SEAL THE BAG PROPERLY (or be prepared to clean up a mess)
The amount of varnish/water mix will depend on the quantity and porosity of the wood in the bag, you'll need to experiment, but it's not a problem if it's not all absorbed. The objective is to make sure each bit of wood is covered, so too much liquid is better than not enough.
After a few minutes shaking, take the contents out of the bag, spread them on a kitchen towel and pat them gently to remove any excess liquid - initially many of the 'planks' will be stuck together by the liquid but as you pat they will separate. Leave them on the kitchen towel in a warm place to dry off.
So a relatively quick and pain free method of creating a large quantity of pre-coloured planks for scratch building.
For more variation in colour I have added inks and/or paints to the 50:50 mix or in some cases just re-coloured a small batch of planks using the 50:50 to get a darker shade.


That is a great idea and process. Sit down one day and cut thousands of pieces so build days fly by.
ReplyDelete