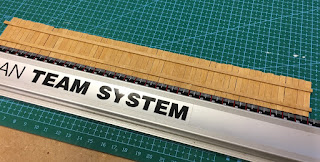
As there will be a reasonable amount of fences in Beaverlick Falls, I've started to make a stock of long fence length which I can cut down to fit a particular building or terrain piece when needed.
Making the fences
Starting with a pile of prepared timber, line up the bottom fence panels against a straight edge. I do this on a cutting mat as it's easier to check the vertical alignment; try and avoid the panels leaning left or right unless you're going for a ramshackle look.
Once you have enough panels lined up, add a panel to either end that has markings to show where the horizontal rails are going to go - I add a couple of marked panels in the middle of the fence too so that I can ensure the rails are correctly spaced.
Glue the back of the rails along the entire length, then stick them to the fence panels using the pencil marks as guides. It's important not to move the rails one stuck down as this will cause the panels to lean. I apply light pressure to the centre of the rail and then work outwards towards each of the ends saving made sure before hand that the rail is lined up with the guides.
Once the rails are stuck add a flat heavy weight ( I use a thick piece of mfd with a weight on top) to the top to ensure the rails are firmly stuck to the panels.
Once the glue is dry that's it. Posts are added at a later stage when the lengths of fence are added to bases of houses etc.


No comments:
Post a Comment